Double-layered Artistry: Becoming a Master of Photographing Your Work
How to Photograph Your Artwork

A piece of art takes a long time to perfect. As artists we pour creative energy, passion, and deep focus into crafting our work. Then, exhausted and up against a deadline, we neglect the crucial part of the process: photographing our masterpiece.
We may be masters of artistry, but if we don’t manage to get over the final hurdle in generating a decent image of our work, then it could, quite literally, result in make or break.
The key to showcasing and selling your work is down to its visual representation, and with the challenges of the last 12 months rendering many galleries closed, artists are relying on less traditional channels for generating awareness of their work – websites, social media channels, and digital platforms.
In the absence of being able to see artwork in-person, a potential buyer requires a photo of the work instead, but the problem with photos is they are only as good as the photographer. The other complication is that screens and devices can inaccurately alter colours, and give a misrepresentation – or even a distortion – of colours and textures that would be visible to the naked eye.
There are a number of things you can do to set yourself up for the best possible photo of your artwork, and whether your objective is getting ‘likes’ on Instagram, catalysing a private sale, or going ‘viral’ with your work, here are a few pointers.
Make the most of your tools
You don’t necessarily need a top spec SLR camera to photograph your work. If you do have one, then there’s a degree of presumption that you know how to use it, but ultimately, the ISO and aperture of your camera play a crucial part in capturing clear, crisp and bright images of your artwork. ISO is essentially the film speed, and the higher the number, the more sensitive the film is to light and so the resulting image is coarser. Studio shots will generally be shot at ISO 100.
The f-stop of the aperture of your camera adjusts how much light is let through the lens by making the opening bigger or smaller. The higher the number, the less light is being passed through. With a DSLR (Digital Single-Lens Reflex), the ideal range for shooting artwork is between f-8 and f-11.
If you don’t own a decent camera then there might be an opportunity to borrow one, or to find a local aspirant photographer or photography student to carry out a quick shoot for you for a nominal fee. With today’s smartphone technology, though, you could easily get away with using an iPhone or Samsung Galaxy – especially the newer models with the triple camera system.
Set the scene
It may sound obvious, but make sure your artwork is hung on a wall with a neutral backdrop so the colours and the visuals ‘pop out’. This is where it needs to be positioned so potential buyers can visualise how it will look in its final state – something that’s a lot more challenging if the piece is still sat on an easel in a messy studio or leaning up against a wall on the floor. If you want to, it can be a good idea to add objects in the frame to provide contextual substance and perspective for sizing as well. This can be as simple as a house plant or a chair – keep it low-key and unobtrusive though, so it doesn’t take the focus away from the main attraction.
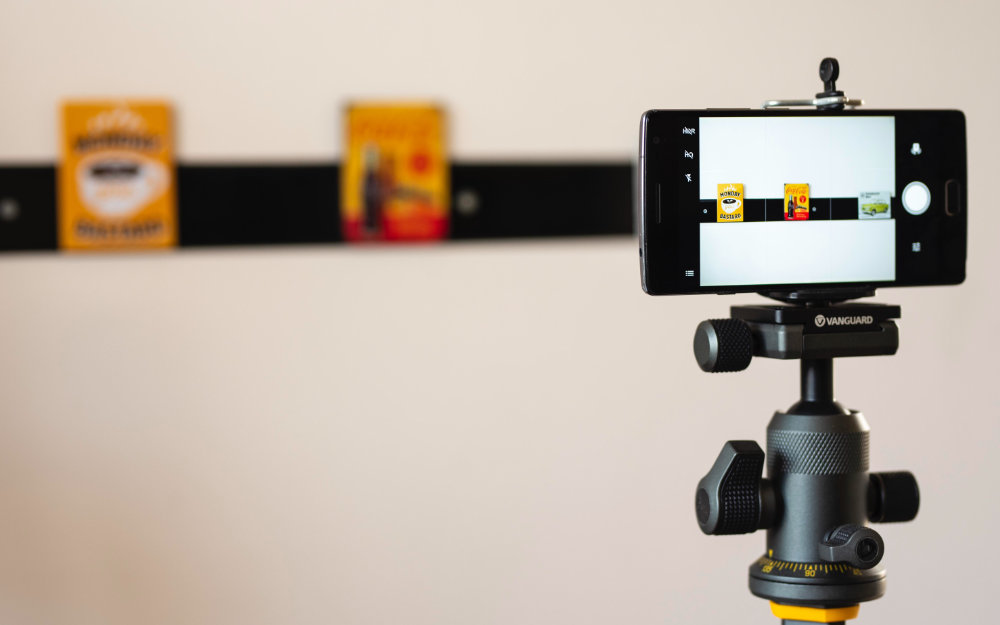
Equip yourself
It’s useful to get yourself a tripod so you can create a sharper and cleaner image without the risk of movement. You can also set the angle and the focus far more effectively with a static camera or phone stand.
Depending on the natural light in your home or studio, you may also want to invest in some professional lighting to help maximise the clarity and visual accuracy of your work when it is translated into photo format.
The good news is, you can pick up lights relatively cost-effectively as all you will need is a minimum of two lights for 2-dimensional work, and probably three to four for 3-dimensional pieces. Position the lights halfway between the camera and your artwork at a 45-degree angle pointing towards the wall – this will help eliminate any shadows or “hot spots”.

Keep practising, and don’t get despondent if it doesn’t turn out great straight away.
Like anything, effective photography is about experimentation with different setups and lighting scenarios. It might also be useful to find other artists who are posting strong and engaging imagery on social media or websites and see if you can gather some inspiration from how they are presenting their work in photographic medium.